 06-03-2009, 11:00 AM
|
#1 |
|
FRISCO LEGEND BABY!!

Join Date: Jun 2009
Location: Wichita, KS
Posts: 10,178
Real Name: James
   |
Ok, I won't be held responsible or will A-L.com if you screw something up. DO THIS AT YOUR OWN RISK!
Alright, I took my time today to write up a DIY for the people that want to swap out the 86-88 headlights to 89-90 headlights. Time It Takes To Do Swap: 1-2 Hours PREPARING FOR THE OPERATION 1) 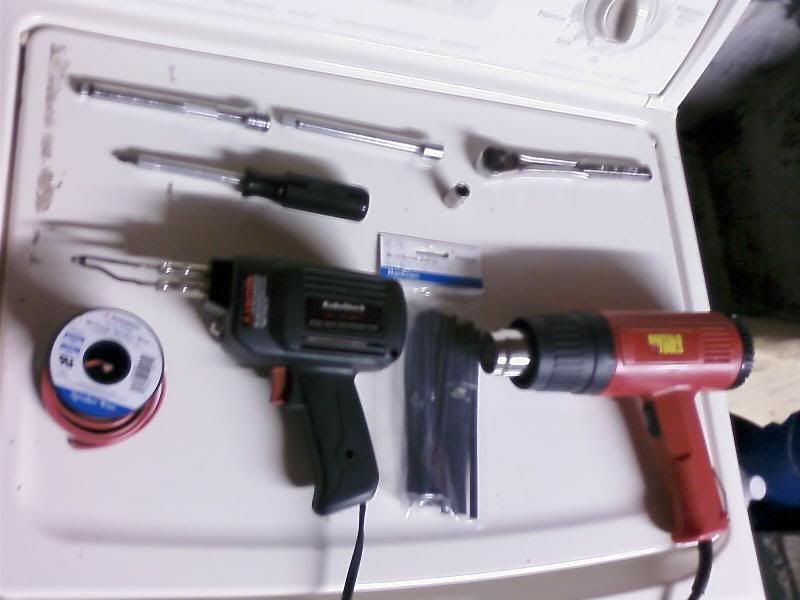 These are the things you will need for the operation: Soldering Iron and Solder, 18 Gauge Wires, Heat Gun and Shrink Tubes, Phillip and Flat Head Screw Driver, 10mm and 12mm sockets, 2 extensions for the sockets, and of course 89-90 1-Piece Headlights, Corners, and Grill. Make sure you get the plug still attached to the light bulbs cause your gonna replace them. 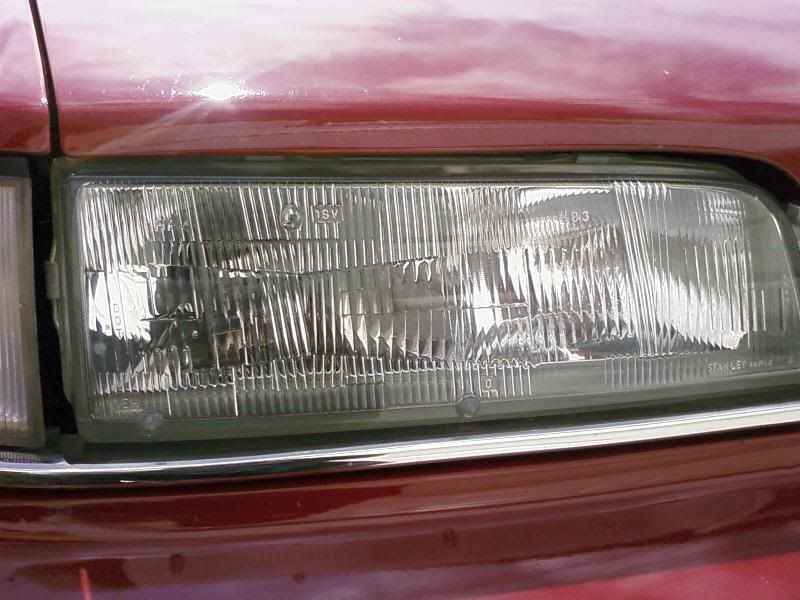 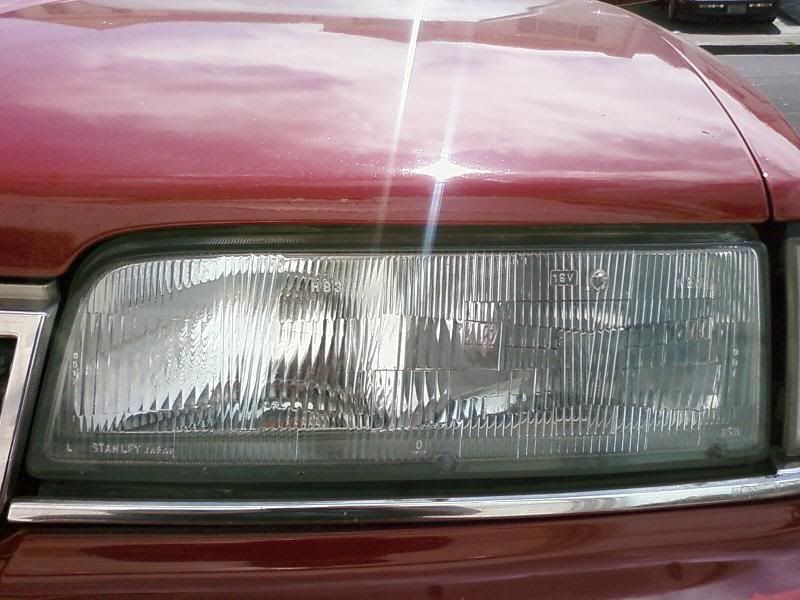 Yes, I know, I got a gap on the grill, that's because I took the badge off and having it painted. 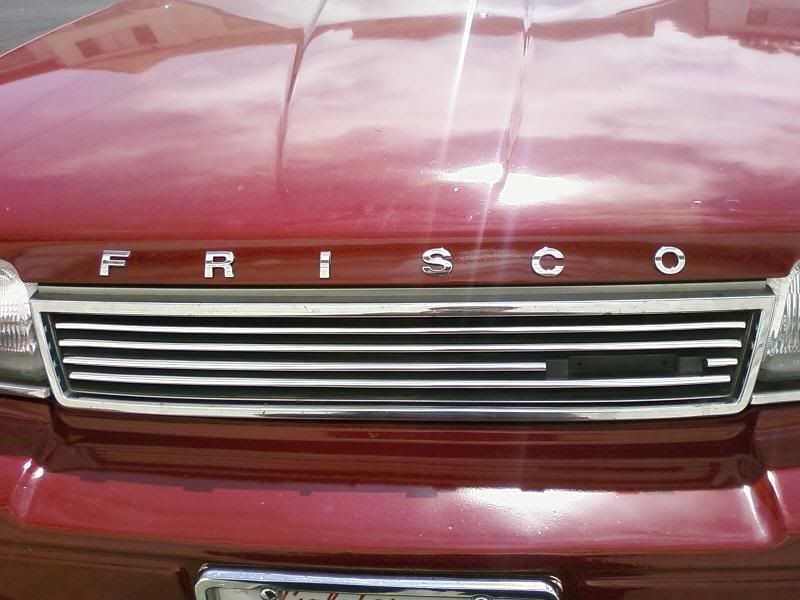 If you don't get the 89-90 corners and use 86-88 which I have, this is what's gonna happen: 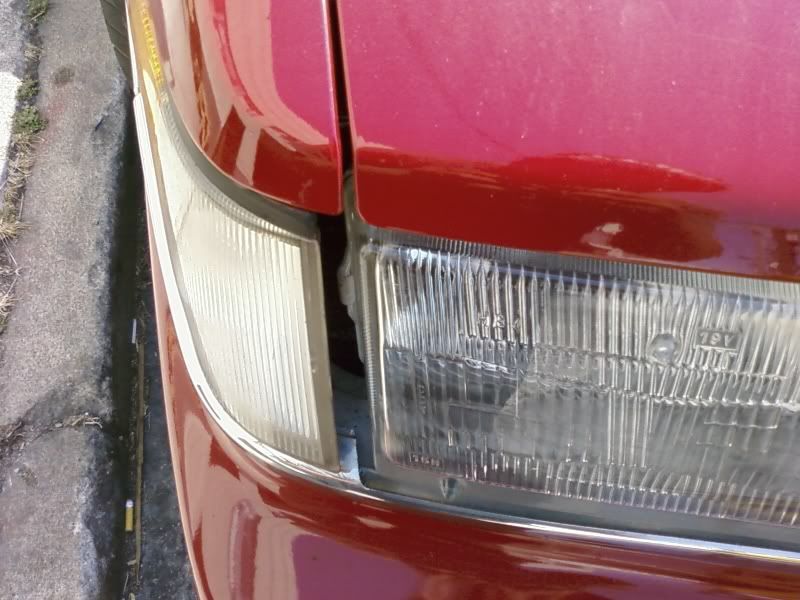 You will get a nasty gap. And the 86-88 grill is a lil bigger than the 89-90. REMOVING THE BUMPER First thing first, remove the negative terminal on the battery so you won't get electrocuted when soldering new wires. I don't want anyone getting hurt. 2) 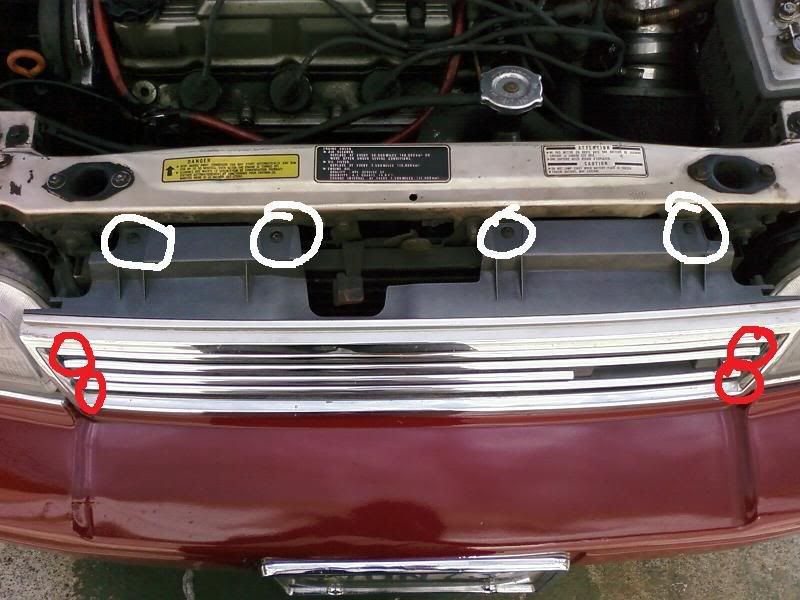 Remove 4 screws on top of the grill. Then, the one's circle in red, grab the flat head screw driver and push down the tabs to remove the grill. 3) 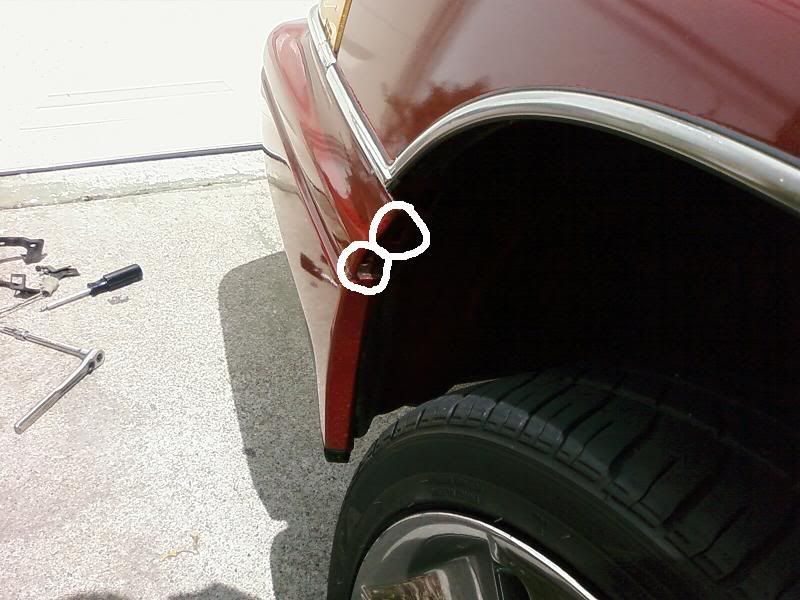 You will need a phillip screw driver to remove 2 screws on each side shown on the pic. 4) 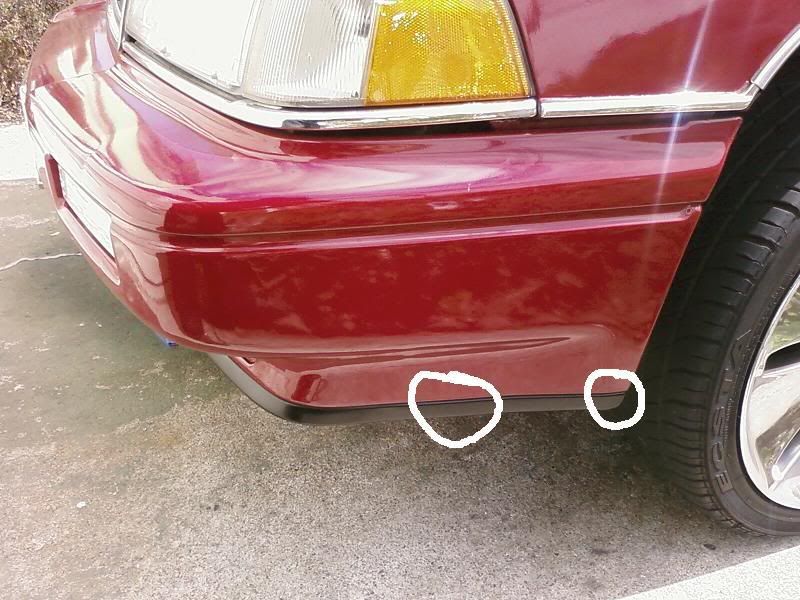 Next, remove 2 bolts with the 10mm socket on both side of the bumper. Then pull the corner bumper towards you so that it can hang. 5) 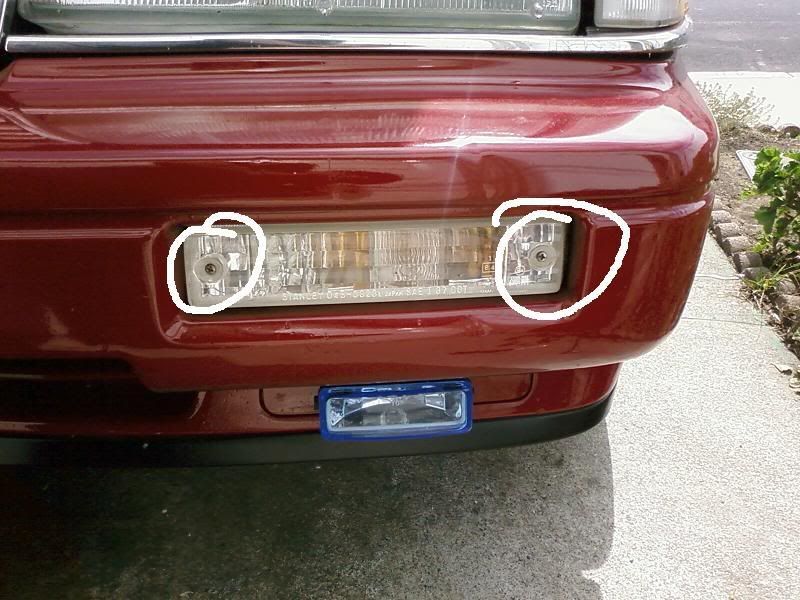 Unscrew 2 screws on both side to remove the bumper light. 6) 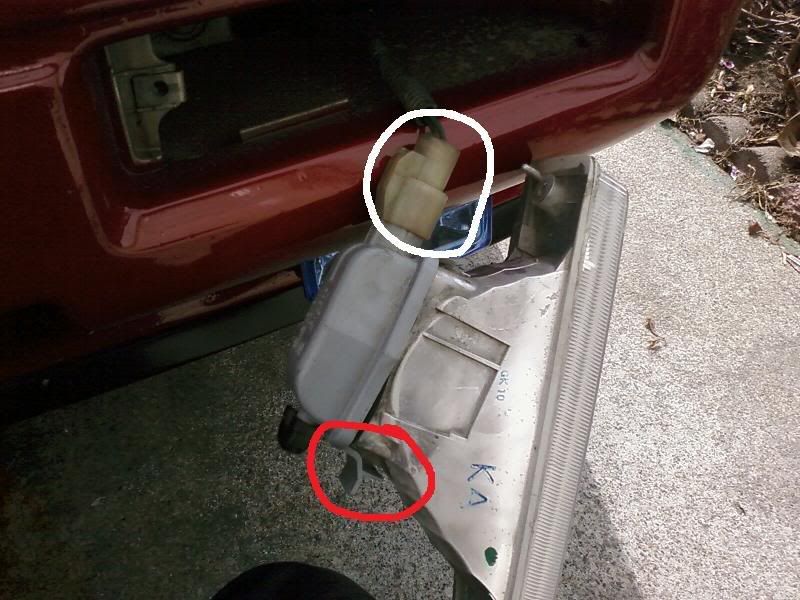 Unplug the light by pushing down the tab. If it doesn't budge, then try pulling the tab circled in red to make it easy for you. 7) 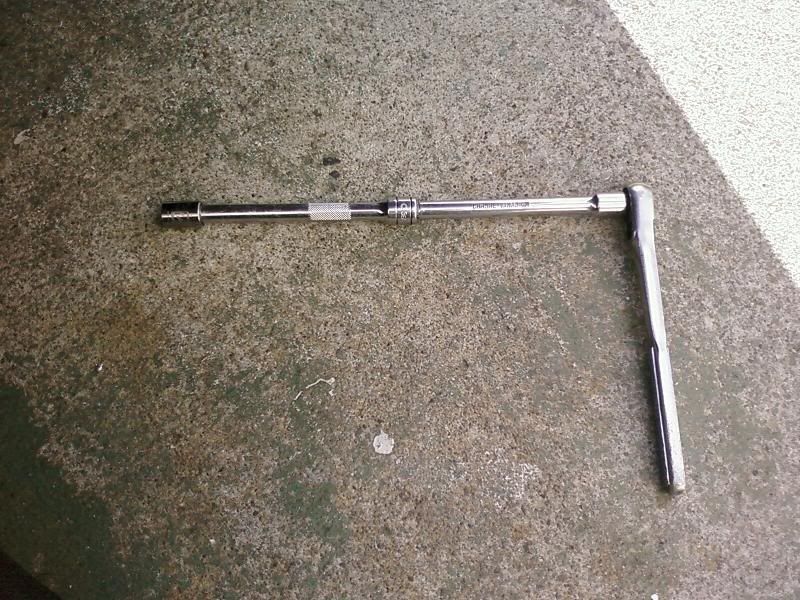 The 2 extensions will make your job a lot easier to remove the bumper. You could use 1, but I use 2. 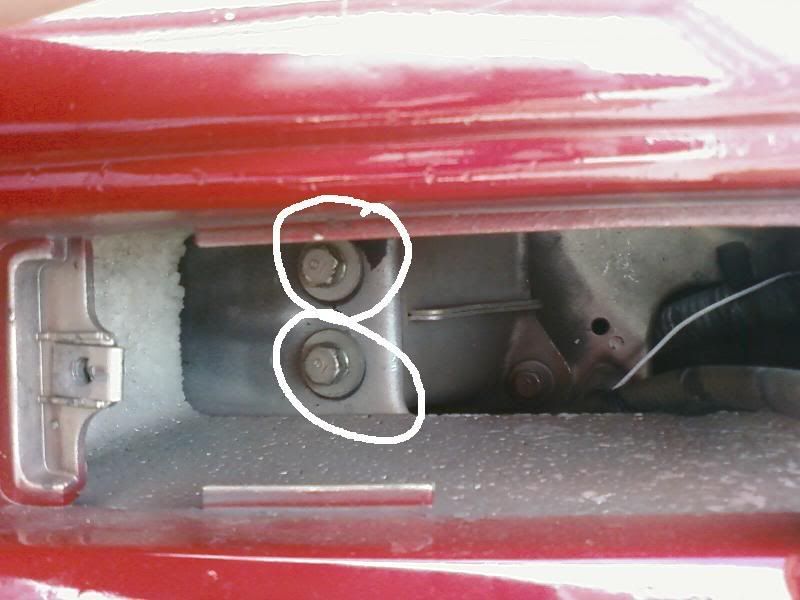 Remove 2 bolts inside the bumper with a 12mm socket and do the same on the other side. 8) 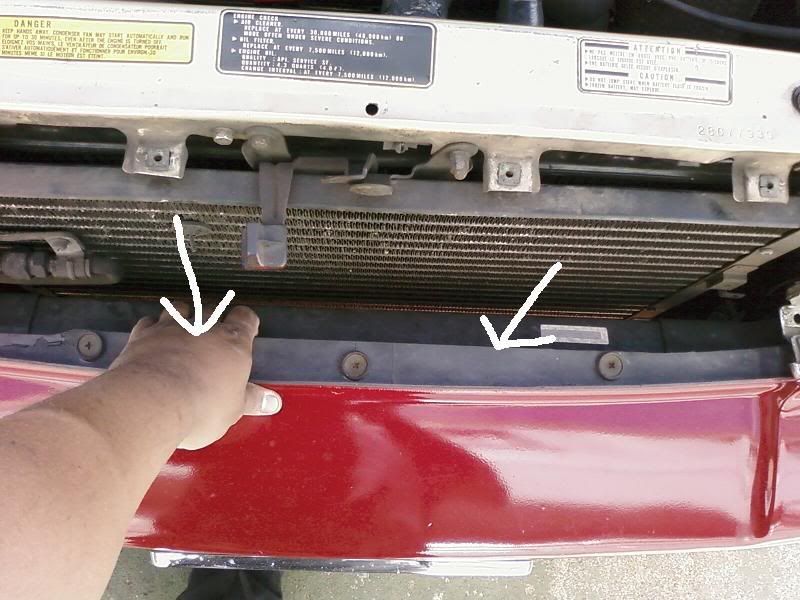 Where the arrows are pointing, there is a gap where you can grab the bumper and gently start pulling it towards you. Just wiggle it so it can come off completely and place it on the ground. 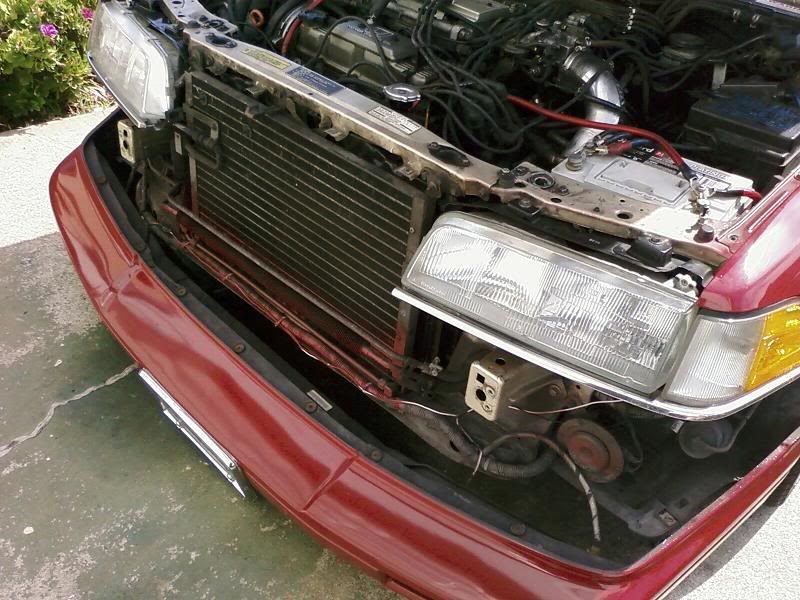 Congratulation, you just removed the bumper from your Legend. REMOVING THE HEADLIGHTS 9) 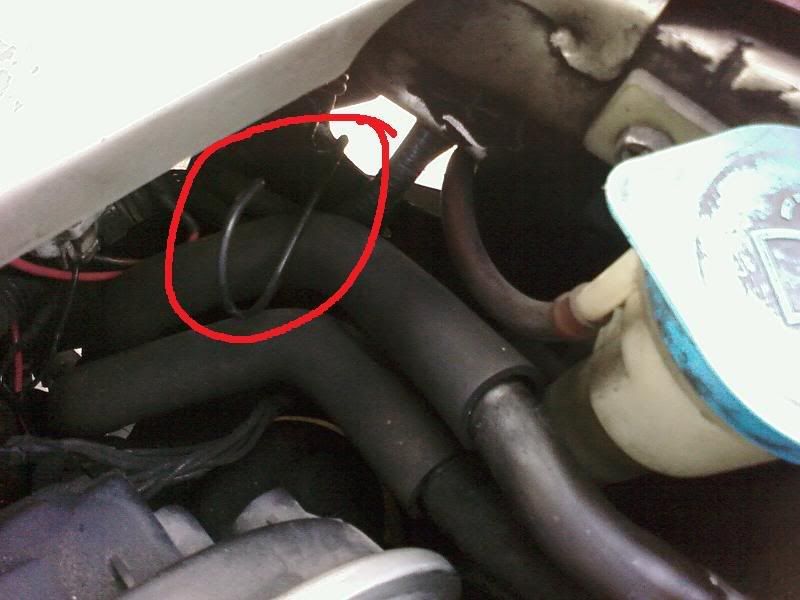 Now your gonna remove the corners. But first, your gonna have to unhook the spring that is holding down the corners circle in red on both sides. 10) 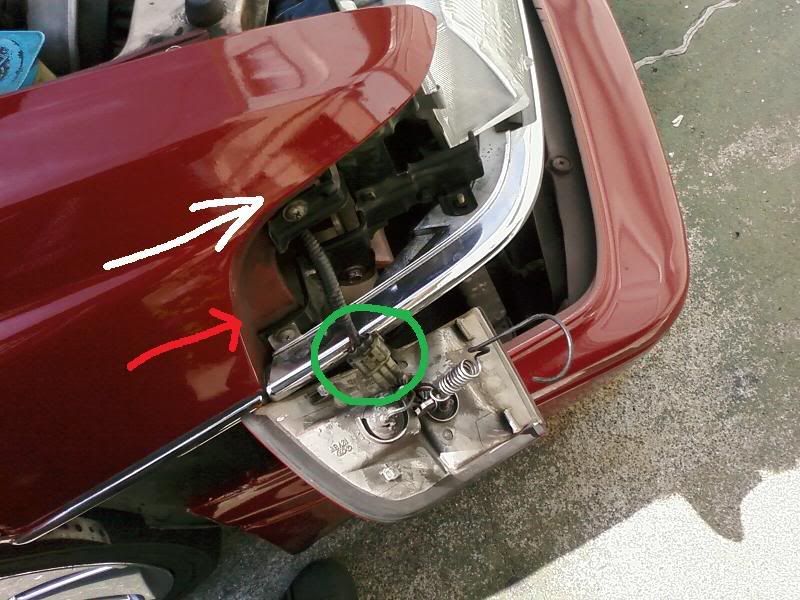 Then with the palm of your hand, push the corners away from you to remove it. If it doesn't want to come off, use a flat head screw driver to pop it off on the red arrow. Be careful not to break it. Then pull the tab up to unplug it circled in green. REMOVE ONE HEADLIGHT AT A TIME PASSENGER SIDE 11) 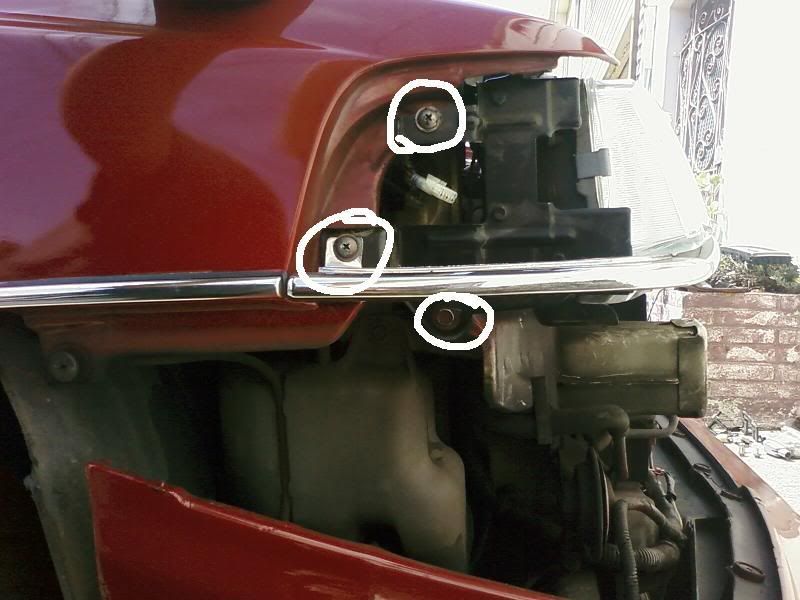 With the phillip screw driver, remove 2 screws. Then use the 10mm socket to remove the bottom one. 12) 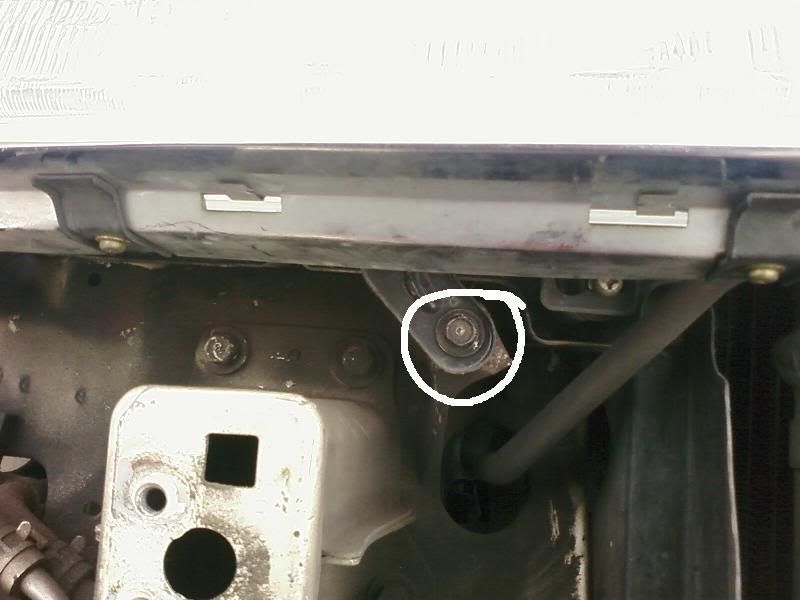 On the front bottom of the headlight, there's only 1 bolt you need to remove. 13) 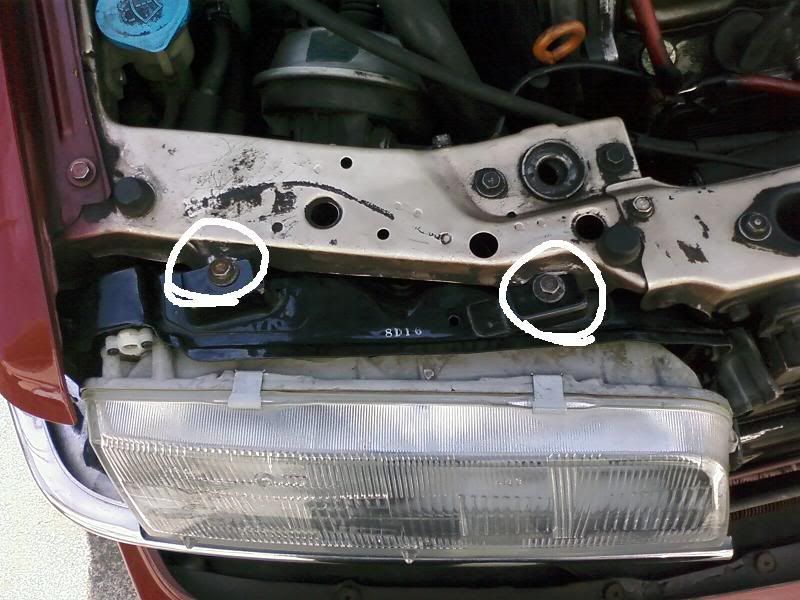 Unscrew the 2 bolts that is holding down the headlight. Be careful, don't let the headlight fall. Then, slowly pull the headlight out and unplug the low/high beam plug and fog lights. RE-SOLDERING NEW PLUGS 14) 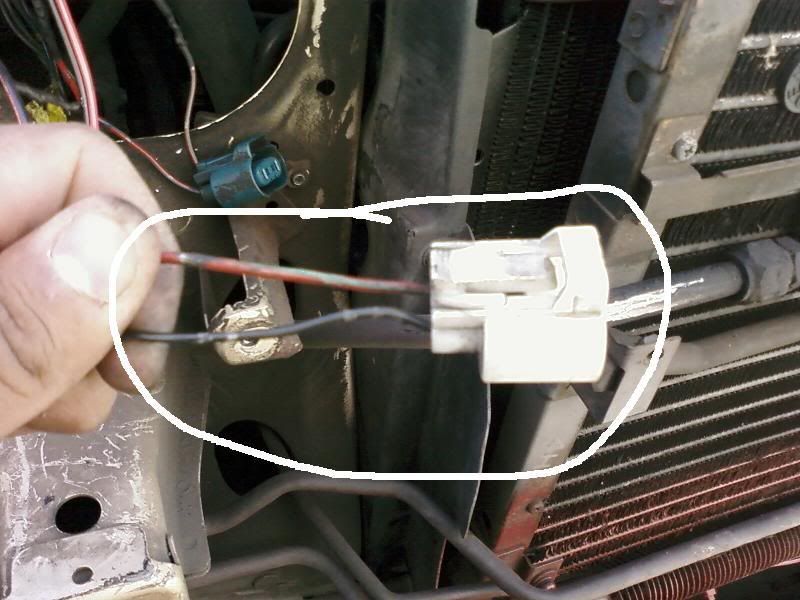 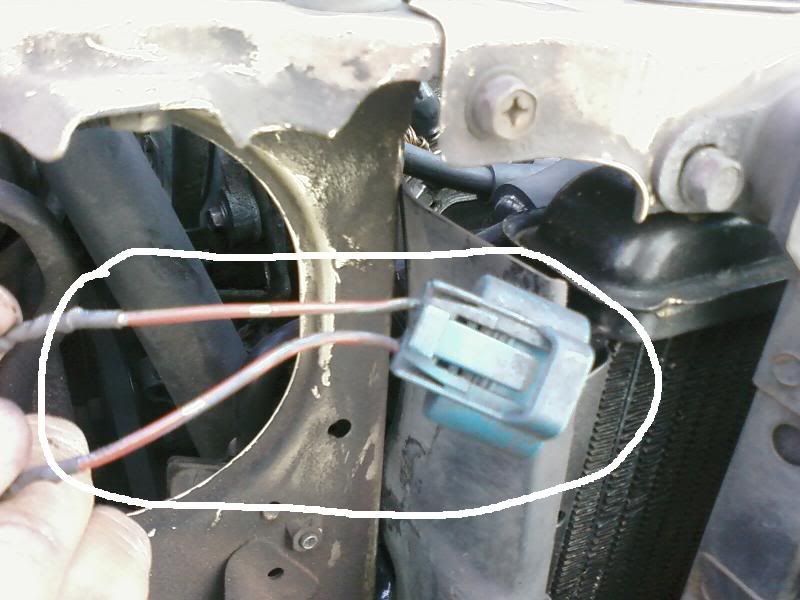 You will need the white plug for the low beam, and the blue plug for the high beam. 15) 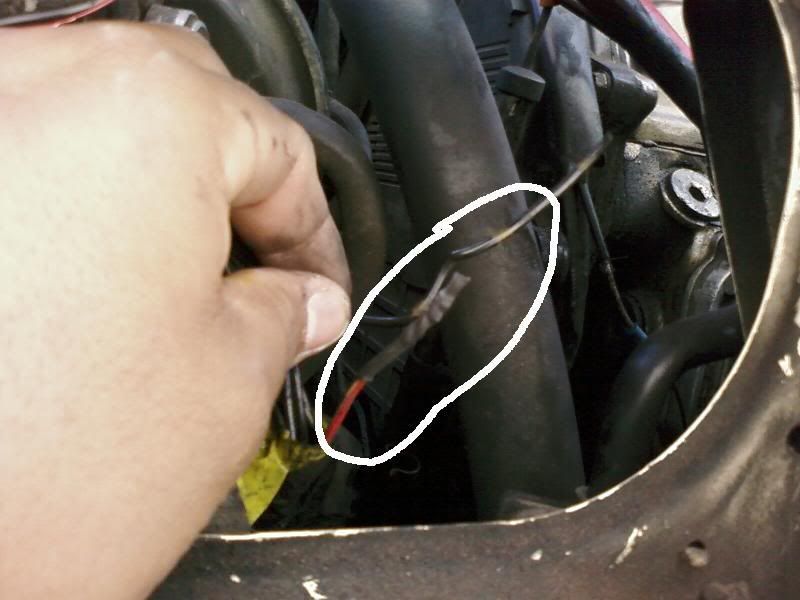 For the fog light plugs, you can either leave it alone, or cut off the plug, then use the shrink tube to seal the tip. Then push the wires somewhere behind the frame for later use. 16) 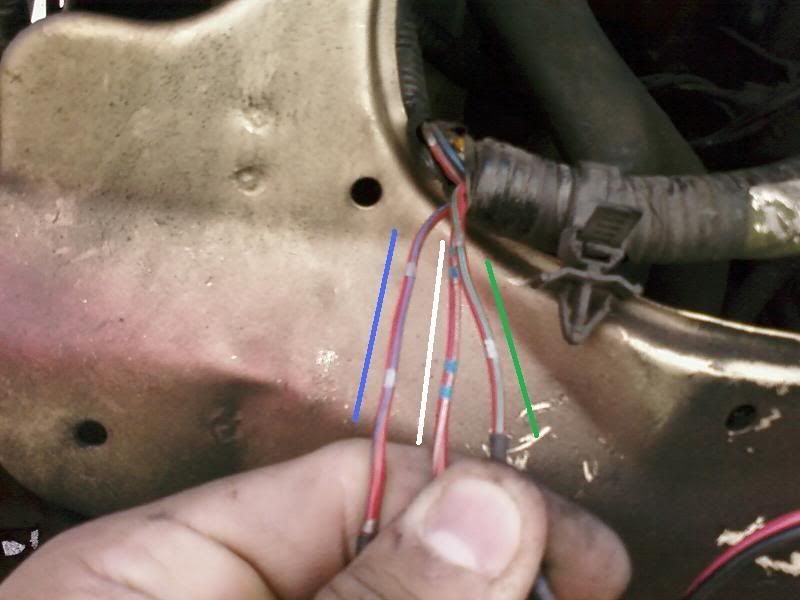 With the original plug, there are 3 colored wires, Red/blue line, Red/white line, and Red/green line. Make sure the wire is long enough to cut. 17) 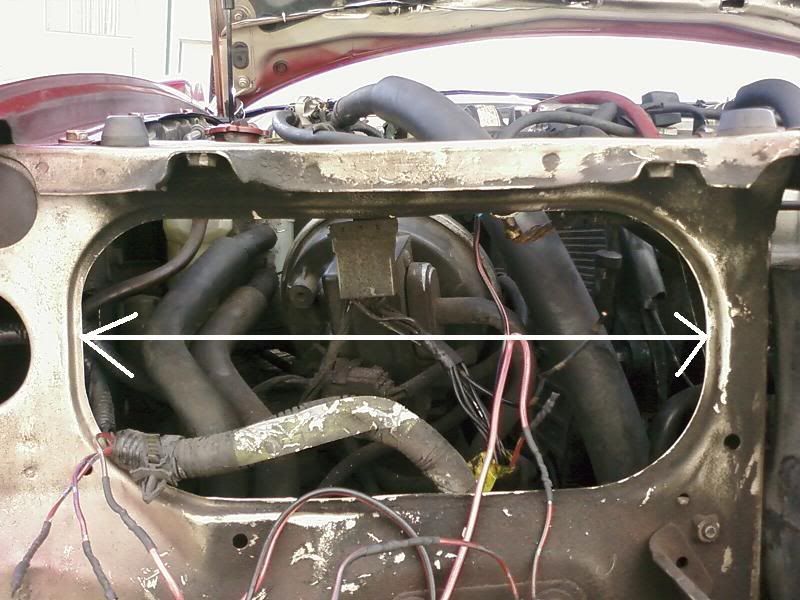 You will need 4 18 gauge wires. Measure from the headlight frame. 18) 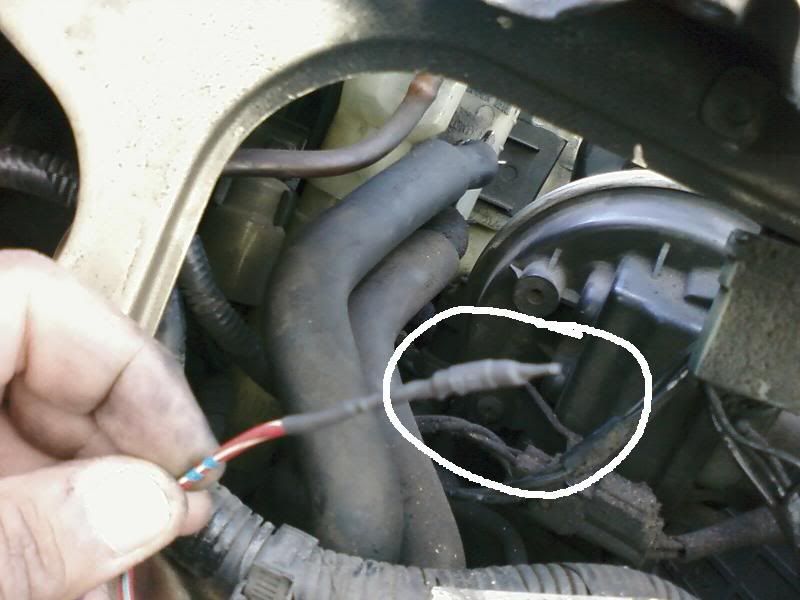 With the Red/white wire, that is going to be useless. Use a shrink tube to seal the tip. 19) 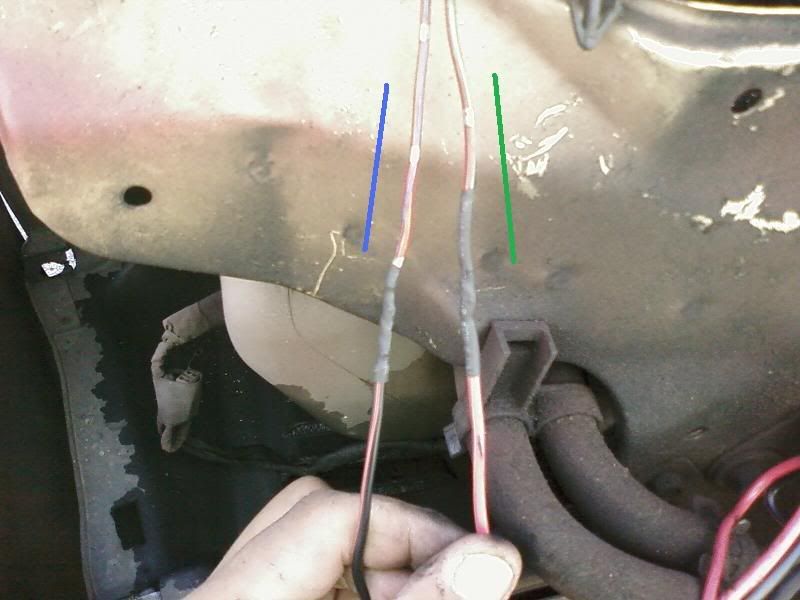 Now your only going to use Red/blue line and Red/green line wires. With 2 18 gauge wires, solder the new wires to the old ones and shrink tube them. 20)  The new wire you just solder on the Red/blue line, solder the other end to the blue plug with the Red/blue wire. For the Red/green wire on the blue plug, solder and shrink tube a new wire for it. 21) 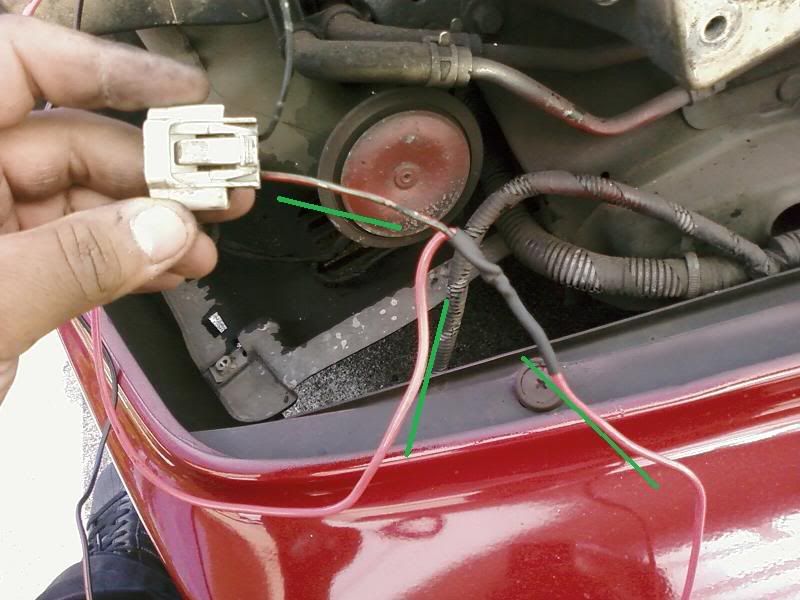 Now, grab and twist the new wires that are solder together for the Red/green wire together with the White plug wire. The Red/green line is the main power to turn on the headlights. 22) 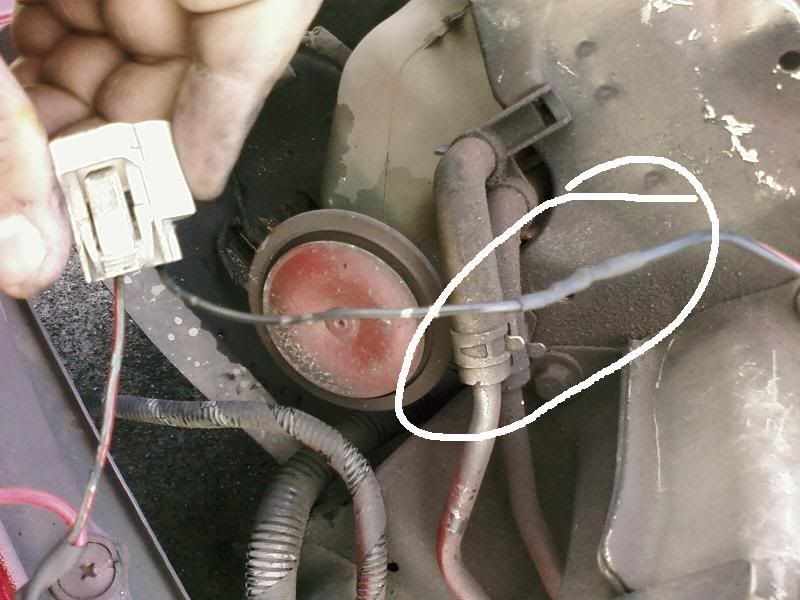 The White plug has a black wire which is the ground. Use the last new wire to ground it to the frame: 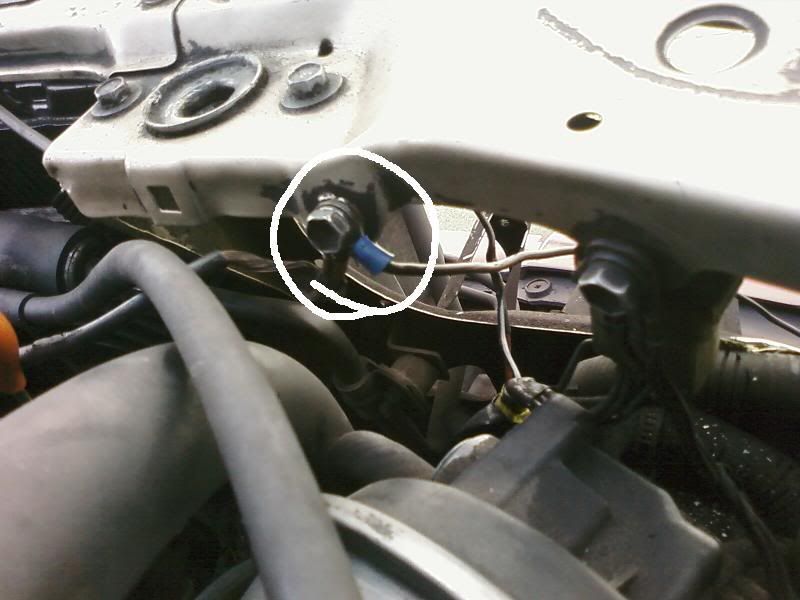 Once everything is wired up, grab your new 1 piece headlight and plug in everything. Then push the wires back into the frame when placing the headlight on the car. Bolt everything up from pics 11)-13) and move over to the driver side. .......... Last edited by sam o nela; 06-27-2009 at 12:41 PM. |

|

|
|
06-03-2009, 11:00 AM
|
#2 |
|
FRISCO LEGEND BABY!!
Join Date: Jun 2009
Location: Wichita, KS
Posts: 10,178
Real Name: James
|
DRIVER SIDE
23)Remove the headlight as you did for the passenger. Unplug everything and place the headlight aside. 24) 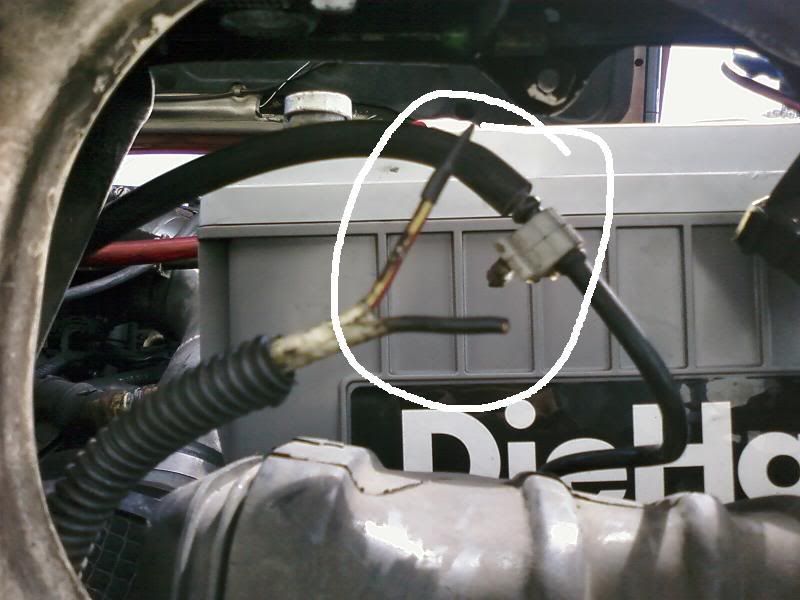 Again cut off the plugs for the fog light, shrink tube the Red/yellow line wire tip close. Then place the wires somewhere for future use. 25) 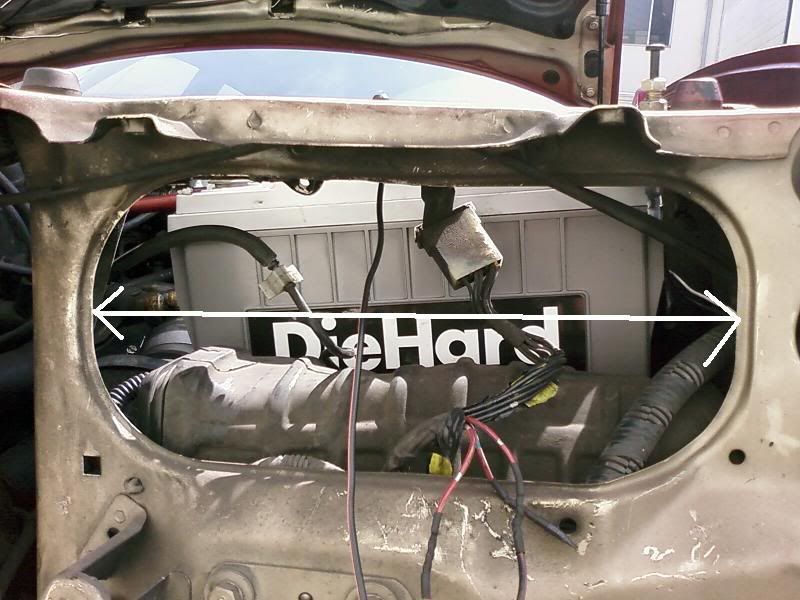 Again, you will need 4 18 gauge wires by measuring the frame for the headlight. 26) 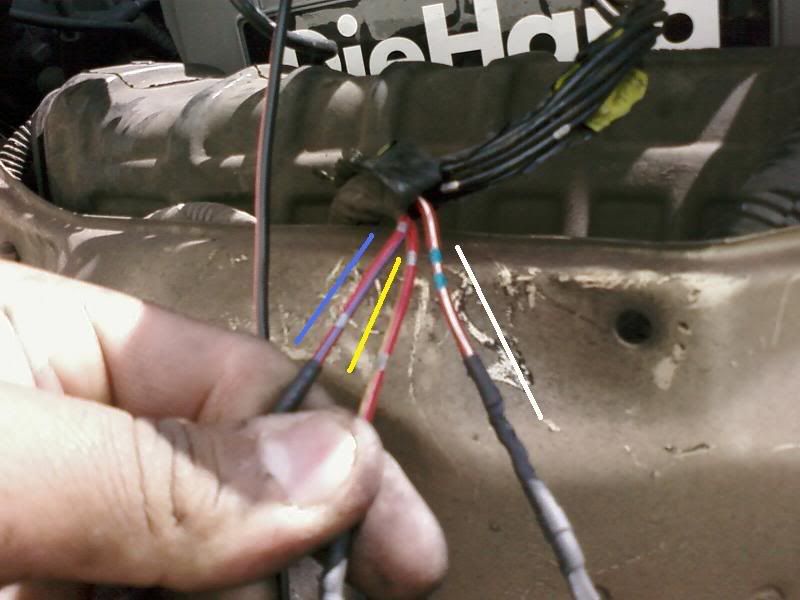 The driver side plug has 3 wires, Red/blue line, Red/yellow line, and Red/white line. Make sure you have enough wire to cut it. 27)  The Red/white line is useless now. So use the shrink tube to seal the tip. 28) 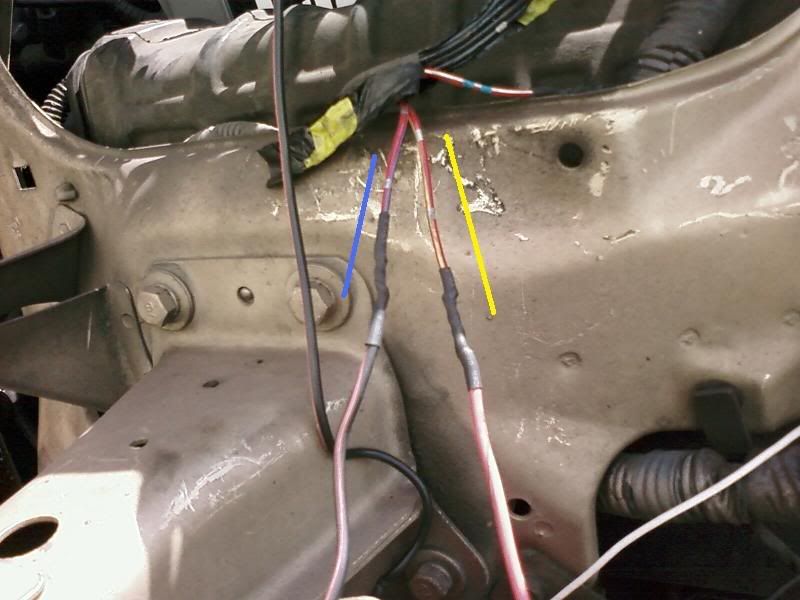 Grab 2 new wires and solder the Red/blue line wire and Red/yellow line wire. 29) 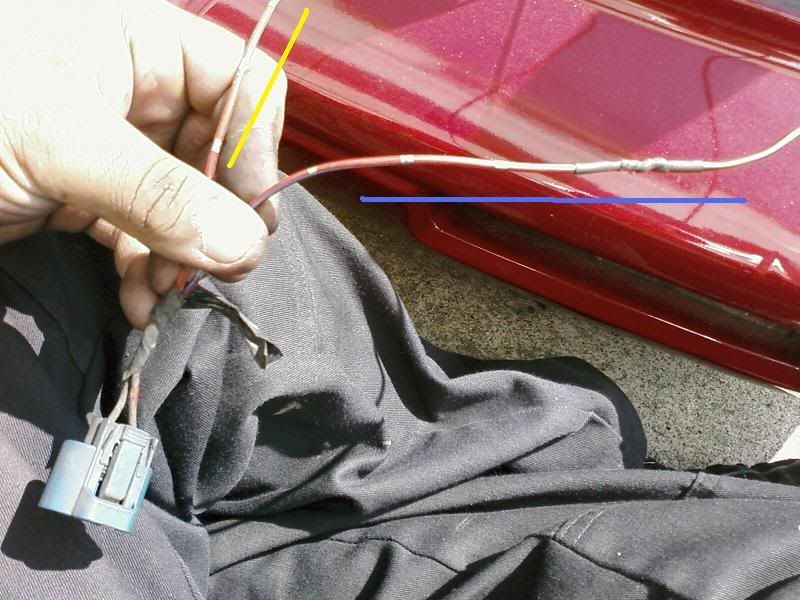 On the Red/blue line wire, solder the end of it to the blue plug Red/blue line wire. 30) 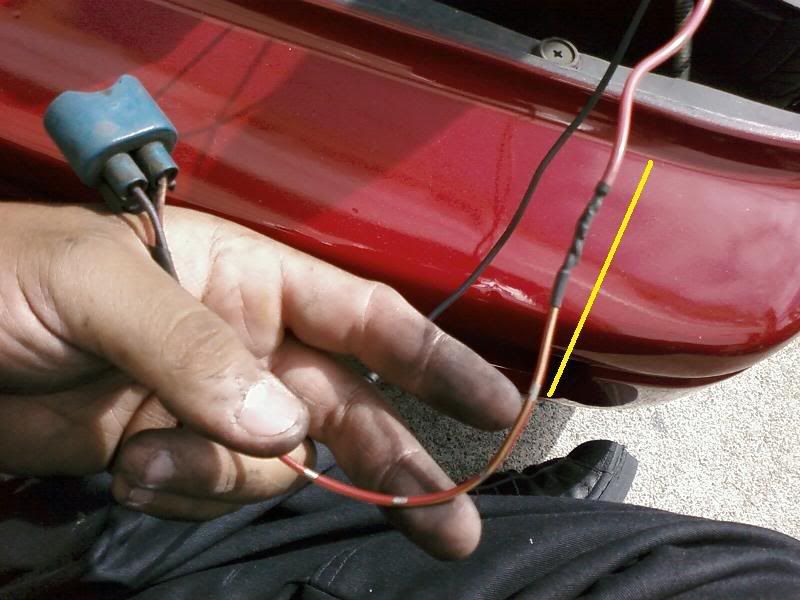 Solder a new wire for the Red/yellow line wire on the blue plug. 31) 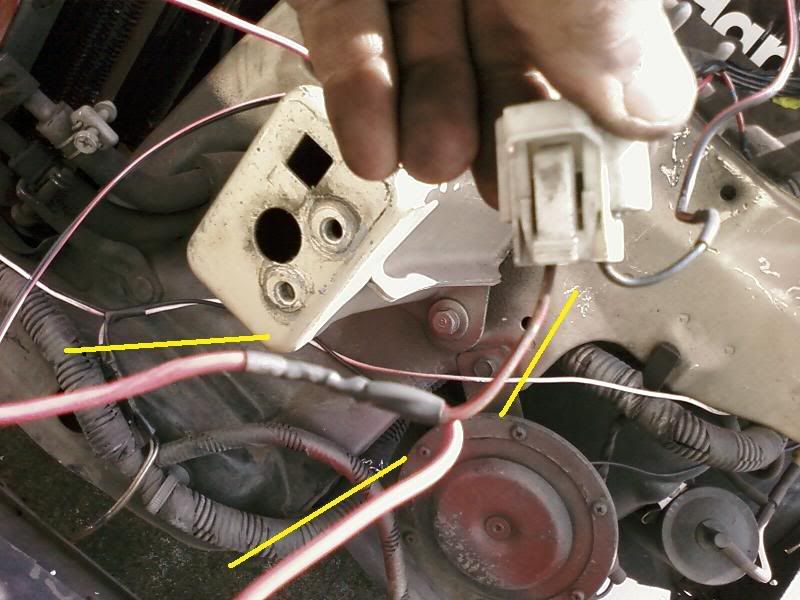 Now grab the 2 new wires solder to the Red/yellow line, and twist them together with the White plug Red/yellow line wire. This wire is the main power for the headlights. 32)  The black wire on the White plug is the ground, so grab your last 18 gauge wire, solder it, and connect it to the frame. Once everything has been wired up, grab your new 1-piece headlight and plug everything up. Push the wires back through the frame and carefully place your headlight back on the car. Bolt everything back together, then test it out. Put your negative terminal back on, turn on your headlights, the turn on the high beams. All the lights should turn on: LOW BEAMS 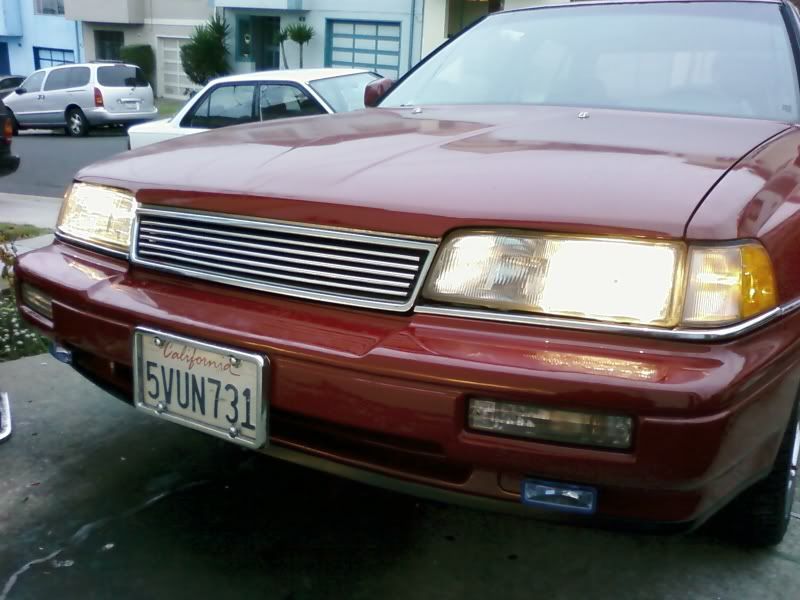 LOW/HIGH BEAMS 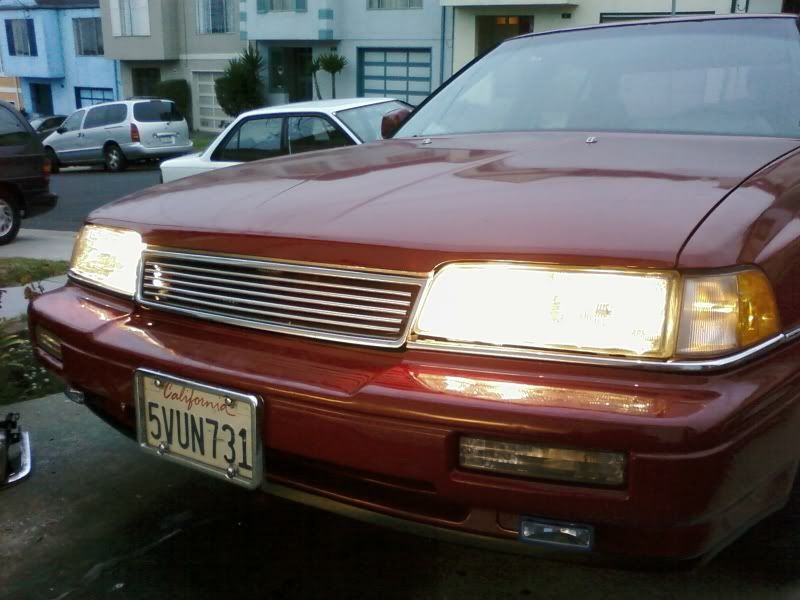 If it doesn't turn on, then the light bulb maybe busted or didn't wire it up right. Go back up the list and double check. Now place your 89-90 corners on, then the bumper back on, bolt the bumper through the bumper light first, then the bottom corners, then the side, then place the bumper lights back on. GRILL 33) 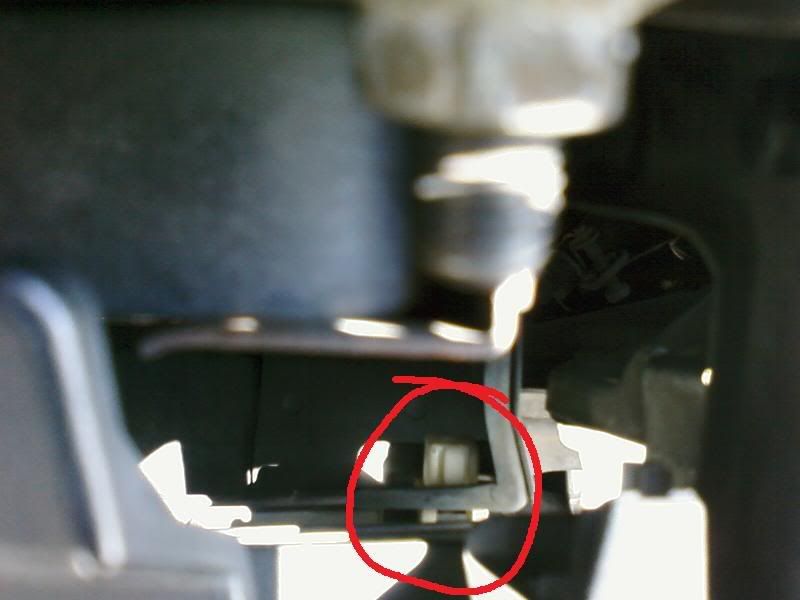 If your new headlight still have the little white tab on the frame of the headlight, your in luck. Place your new grill on, screw in the 4 screws on top of the grill. 34) 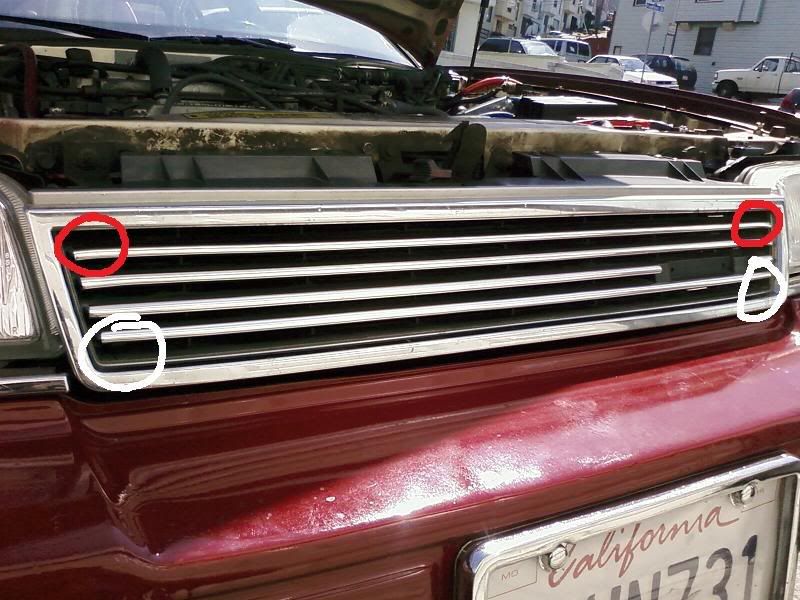 The one circled in White, you should be able to see the white tab with a hole in the middle. If you got the same screw that is used to hold down the grill, use those screws to hold the bottom part of the grill. The one circle in red, those are the clips that also holds the grill. But if you don't have any, that's ok as long as the bottom screws are on. There you have it ladies and gentlemen, you just completed the swap for the 86-88 headlights to 89-90. Hope this DIY will help and thanks for looking. Happy Swapping. 
Last edited by sam o nela; 06-27-2009 at 12:41 PM. |
|
|
|
|
06-27-2009, 12:42 PM
|
#3 |
|
Banned

Join Date: Jun 2009
Location: SoCal
Posts: 7,249
 |
Great job James
 Sorry so slow in the merging...been busy with work
|
|
|
|
|
12-26-2014, 03:00 AM
|
#4 |
|
{Legend}{Supporter}

|
This was a lot of work thanks man I saw your vids on youtube thx
__________________
A C U R A _ L E G E N D  S u p p o r t e r
|
|
|
|
 |
| Bookmarks |
| Currently Active Users Viewing This Thread: 1 (0 members and 1 guests) | |
|
|


 Linear Mode

